How to Create a Resource Group with Azure PowerShell
A resource group is a logical container for Azure resources. It allows you to manage related resources together. Creating a new resource group is one of the first tasks you do when starting a new Azure solution.
Here are the steps on how to create a resource group with Azure PowerShell:
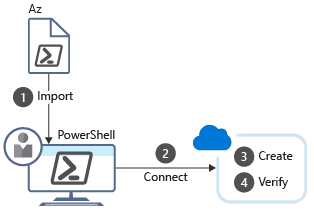
- Import the Azure cmdlets.
- Connect to your Azure subscription.
- Create the resource group.
- Verify that the resource group was created successfully.
Import the Azure cmdlets
The Azure cmdlets are automatically loaded when you use them in PowerShell. However, if you have changed the default module autoloading settings, you may need to manually import the Azure module.
Connect to your Azure subscription
You need to authenticate with Azure before you can execute Azure commands. The Connect-AzAccount cmdlet prompts for your Azure credentials and then connects to your Azure subscription.
Create the resource group
The New-AzResourceGroup cmdlet creates a new resource group. The following command creates a resource group named myResourceGroup in the West US region:
New-AzResourceGroup -Name myResourceGroup -Location "West US"
Verify that the resource group was created successfully
You can verify that the resource group was created successfully by running the Get-AzResourceGroup cmdlet. The following command gets the resource group named myResourceGroup:
Get-AzResourceGroup -Name myResourceGroup
The output of the Get-AzResourceGroup cmdlet should show that the resource group was created successfully.

No comments:
Post a Comment