How to Determine Your Azure Resource Limits
Azure imposes limits on the number of resources that you can create in a subscription. These limits are designed to protect Azure from abuse and to ensure that all users have a fair share of resources.
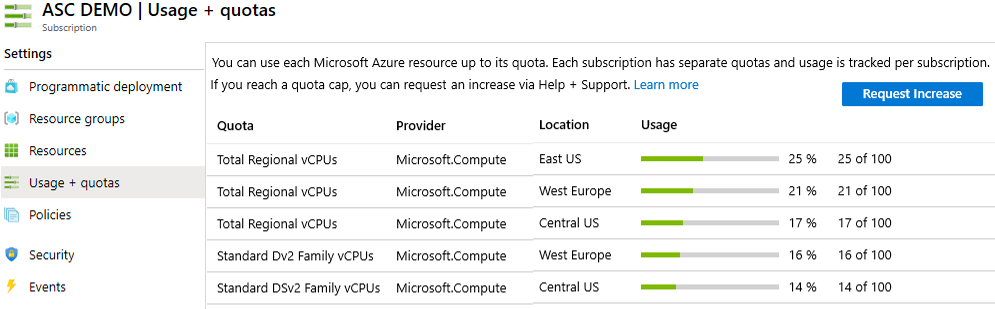
How to view your resource limits
To view your resource limits, you can use the Azure portal, the Azure CLI, or the Azure PowerShell.
Here are the steps on how to view your resource limits using the Azure portal:
- Go to the Azure portal.
- Click the Subscriptions blade.
- Select the subscription that you want to view the limits for.
- Click the Resource limits tab.
Here are the steps on how to view your resource limits using the Azure CLI:
- Install the Azure CLI.
- Open a command prompt.
- Run the following command:
az account show --subscription <subscription-name>
This will show you the limits for your subscription.
Here are the steps on how to view your resource limits using the Azure PowerShell:
- Install the Azure PowerShell module.
- Open a PowerShell console.
- Run the following command:
Get-AzSubscription -SubscriptionName <subscription-name>
This will show you the limits for your subscription.
How to increase your resource limits
If you need to increase your resource limits, you can submit a request to Azure. To do this, you will need to provide a justification for the increase.
Here are the steps on how to increase your resource limits:
- Go to the Azure portal.
- Click the Subscriptions blade.
- Select the subscription that you want to increase the limits for.
- Click the Resource limits tab.
- Click the Request increase button.
- Provide a justification for the increase.
- Click the Submit button.
Conclusion
Determining your Azure resource limits is an important step in managing your Azure environment. By understanding your limits, you can avoid exceeding them and incurring charges. You can also use your limits to plan for future growth.

No comments:
Post a Comment